Summer is pretty much over.

But you know what?
I am ok with it.
Actually at this point, I am welcoming fall. I have had some serious soup cravings lately and let me tell you what...this soup won.

Usually I am the girl that wants it to be 95+ degrees all year round with NO SNOW EVER.
And I'm sticking with that last part.
BUT since having a kid...and taking care of said kid in a house with only a window air conditioner... I am ok with the heat wave heading on out.
Also, I was like a billion pounds pregnant last summer when it literally was 95+ degrees every single day... and it wasn't fun.
And this year was fun, but you can't take a 6-9 month old child to the beach for 8 hours in 95+ degree weather.. No.
And you can't tell a 6-9 month old baby to go run through the sprinkler when it gets so hot we can't even breath.

So goodbye summer.
Hello fall.
Fall means soup and cute sweaters and scarves and pumpkin and snuggling to get warm and pretty leaves and holidays and last minute attempts to enjoy the outdoors and coffee and hot cocoa and and and...
And soup.
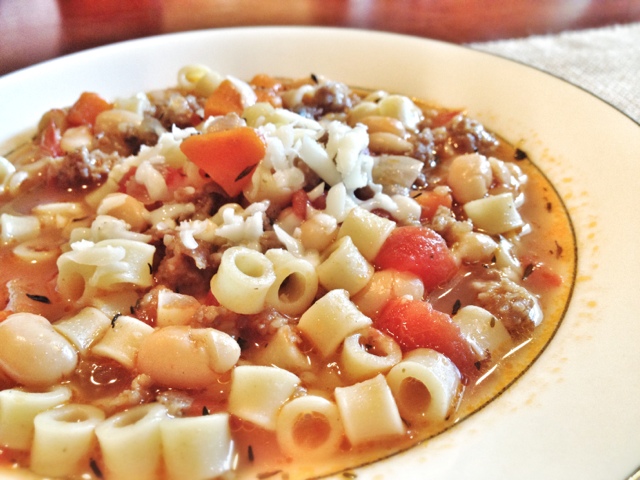
Italian Sausage and White Bean Soup
Ingredients:
1 15oz. can great northern beans or cannellini beans, drained
1 lb ground sausage
1 small onion, diced
1 medium carrot, diced
3 tbsp olive oil
2-3 garlic cloves, minced
1 15oz. can diced tomatoes
6-8 cups chicken broth
1 tsp. dried thyme
2 bay leaves
salt and pepper, to taste
1 cup ditalini pasta
grated parmesan or mozzarella
Directions:
Brown the sausage in a large pot and remove when done. Remove most of the grease (if any) and add olive oil, carrot, and onion and saute about 5 minutes until soft. Add garlic and saute another minute.
Add tomatoes, 6 cups broth, thyme, bay leaves, salt and pepper, beans, and sausage and cover. Cook on low for an hour at a simmer. Add pasta and cook uncovered until pasta is tender. At this point you can determine if you want to add more broth. I made 8 cups of broth just in case, but only ended up using 6 cups.
Top with grated cheese before serving. (Parmesan is preferred over mozzarella)
Recipe slightly adapted from: The Italian Dish

I told you this soup won.


