Showing posts with label dessert. Show all posts

Sunday, September 9, 2012

Chocolate Chunk Oreo Chunk Chocoholic Cookies

Oh hi! Remember that time when I told you I was pregnant? 


Ya. These are pregnant lady cookies. 
Meaning these are "I don't care if it's 10 o'clock at night. I need chocolate cookies now!" cookies. 


And the truth is, I feel like these pictures are kind of crap. 

They just don't do these cookies justice. 
Because everything about these cookies makes a pregnant lady happy. 

So that's a good cookie. 

Chocolate Chunk Oreo Chunk Chocoholic Cookies

Ingredients:
2 sticks butter, softened
1 cup brown sugar
1 cup white sugar
2 eggs
2 tsp. vanilla
2 cups flour
1 cup cocoa powder
1 tsp. baking soda
1/2 tsp. salt
1 1/2 cup chocolate chunks
10 slightly crushed oreos (the original recipe calls for 20, but I only had 10...add however much you want)

Directions:
Preheat oven to 350.

Stir together flour, cocoa powder, baking soda, and salt in a bowl and set aside. 

Cream together butter and sugar until fluffy. Beat eggs in one at a time until blended. Add vanilla and beat until mixed. With the mixer on low, slowly add flour mixture until fully combined. Stir in the chocolate chunks and oreos. 

Drop by teaspoonfuls onto an ungreased cookie sheet. Bake for 9 minutes. They will look slightly undone, but leave them on the sheet for a couple minutes before moving them to cooling racks. Overbaked chocolate cookies are no good. 

Makes 4-5 dozen cookies. 

Recipe slightly adapted from: Confessions of a Cookbook Queen


Also, like I said, it was 10 o'clock at night and I had to make so many adaptions to this recipe that I didn't even know if it would turn out...so I wasn't really planning for pictures. But SO delish they were!

Saturday, August 11, 2012

Strawberry Shortcake Cake

I originally titled this post, "The Perfect Summer Cake."


And quite honestly, it IS the perfect summer cake. I've made it four times already this summer and every single time it tasted perfect.


I've made this cake a few different ways: four full layers (which, by the way, makes the cake literally a foot tall), four half layers, two full layers, and finally (as you can see in this photo) zebra.


I found out the hard way that layering four full layers made the cake look super cool, but it barely even fit in the fridge. It was so tall that cutting a piece took 2 large knives, 4 hands, and a quick plate. 

Looked impressive. 
Ridiculously unpractical.

So, this time I decided to zebra the layers. This particular batter was a little bit thicker than I would have preferred, so the layers didn't spread as evenly or pretty as I would have liked. But the effect was still impressive.

If you've never made a zebra cake before, its SO easy. You just pour 1/3 cup of white batter in the center of the pan; and then 1/3 cup of red batter in the center of the white batter. Keep pouring directly in the center with alternating colors until the pan is filled (per baking directions.)


In between each layer (no matter how many layers you do) spread a generous amount of whipped cream and chopped strawberries. 


The original recipe calls for white cake mix and red velvet cake mix. I've made it that way and it is delicious. But this time I couldn't find red velvet cake mix anywhere. So I substituted with strawberry cake mix. 

Either one you choose tastes amazing.


Even with four layers this cake was incredibly light and refreshing.

AND its made with cake mix! So consider it quick and easy.

Strawberry Shortcake Cake

Ingredients:
Box white cake
Box red velvet cake
2 16 oz containers of whipped cream
1 lb strawberries, chopped

Directions:
Preheat oven to 350.

Mix cake mixes according to directions on box. Lightly grease two 9 inch cake pans. To zebra the layers pour 1/3 cup of white batter in the center of the pan; and then 1/3 cup of red batter in the center of the white batter. Keep pouring directly in the center with alternating colors until both pans are filled (about 2/3 full.)

Bake for 30 minutes or until center is set (use a knife or toothpick to test...if it comes out clean it's done!)

Once both layers are completely cooled, spread whipped cream on top of the bottom layer. Top with strawberries and second layer. Frost the entire cake with remaining whipped cream and top with strawberries.

If you are going to travel with this cake I've found it to be easier to just assemble on site. Whipped cream doesn't hold up as well as frosting in heat or in travel, so keep it in the fridge until ready to serve.

Recipe adapted from: I am baker


This really is the perfect summer cake.

Saturday, July 14, 2012

Peanut Butter Crispies

I don't even know if Peanut Butter Crispies is really the right name for this. 


I mean, they are peanut-butter-ey. 
And they are crispy. 

But there aren't any "Krispies" as per usual in a "Krispy Treat."


But we're not being literal with this dessert. 

Literal would be titled "Peanut Butter Marshmallow Honey Bunches of Oats and Frosted Flakes drizzled with Peanut Butter and Fudge Treats."

And we both know THATS not going to happen. 
So, Peanut Butter Crispies it is. 

Anywho, one day I was like "Hey husband, why aren't there any delicious treats in this house?!" And he was all, "I don't know? How come you never make any delicious treats for us to eat right now?" 

Doesn't really make sense. 

Okay, what really happened was I was like, "I'm hungry and want snacks now!" And then I went and made a full pan of all the sweet stuff I could muster up. 


True story? Husband ate almost the entire pan himself. 

(Snack thief)

Peanut Butter Crispies

Ingredients:
3 cups Honey Bunches of Oats cereal
2 cups Frosted Flakes cereal
1/2 cup peanut butter
1 7oz container marshmallow fluff
2 tbsp (each) melted peanut butter and fudge for drizzling (optional)

Directions:
Heat 1/2 cup peanut butter and container of marshmallow fluff in a pan over medium heat until completely melted and combined. 

Mix the cereal and PB/marshmallow mixture and press into a lightly greased 9x9 brownie pan. Drizzle with peanut butter and fudge and let chill in the refrigerator for a minimum of 30 minutes. 

Instant gratification people. 

Tuesday, June 26, 2012

Banana Bread

There's something about starting a blog that requires you to write in it sometimes. 


Oh yea. 

It's that you are required to write in it sometimes. 
I guess I got confused. 

But really I just got busy. Once summer rolls around stuff happens, people travel, amazing and wonderful things take place. And I find myself avoiding the computer. I live in Michigan, so you have to understand that we get approximately three months (and three months only) where the weather reaches temperatures ABOVE 40. It's amazing. 

So I hope you will understand when I show up late for the blog party. Or whatever. 

IT'S SUMMER! 


All of that being said, I have still been cooking and baking. (And eating.) 

Check out this banana bread! 


Banana bread is not a very "summery" treat. I know. I get it.

BUT I had overripe bananas in my freezer and a late night craving. So bear with me. 


I hope you know about overripe bananas. But hey, if you don't it's okay. I'll tell you. 

When your bananas get brown and gross looking...toss them in the freezer. Then when you are laying on the couch at 11 o'clock at night and suddenly need banana bread slathered in homemade cinnamon honey butter, you'll be prepared. 

Toss the frozen bananas in a warm water bath for 5 or so minutes and when they thaw you can squeeze the banana goo out of the peels for perfect banana bread. 

(I know...banana goo is not the most appetizing description...especially when my job is to make this appetizing. But I'm just calling it like it is.)


So I've made this recipe like 400 times and every single time my husband has eaten it without complaint. No problems. 

He's usually really easy to please like that. As long as the rice is fully cooked and I haven't over garlickified something (although he's warming up to my strong obsession with too much garlic) he's usually pretty happy.

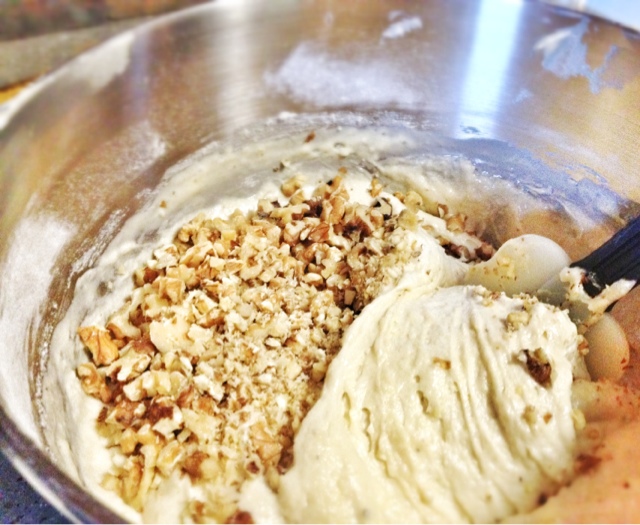
But this time he took one bite and said, "this has walnuts in it?!?!" like I had taken his least favorite food and stuffed it in his favorite food just to be mean. 

Note to self: apparently my husband doesn't like walnuts in his bread. My bad.


Anywho, it turns out that was the only problem with this banana bread. The optional addition of walnuts. 

So make this banana bread. 
Nuts or not.
Summer or not.

Just make it. 

Banana Bread

Ingredients:
10 tbsp plus 1 tsp butter
3 mashed ripe bananas
1/2 cup sour cream
2 large eggs
1 1/2 tsp vanilla
2 cups flour
3/4 cup plus 2 tbsp sugar
1 tsp baking soda
3/4 tsp baking powder
1/2 tsp salt
1 cup toasted, chopped walnuts

Directions:
Preheat oven to 350 degrees. 

Lightly grease a bread pan with 1 tsp of the butter. Puree the bananas, sour cream, eggs, and vanilla in a food processor. Sift the flour, sugar, baking soda, baking powder, and salt into the bowl of an electric mixer fixed with a whisk attachment. Add the remaining 10 tbsp of butter and mix on medium-low speed until blended, about 30 seconds. Add the banana mixture in 3 batches, scraping the sides of the bowl and mixing on medium speed between each addition. Fold in the nuts.

Pour into the loaf pan. Bake until lightly browned and bread bounces back to the touch, about 1 hour 10 minutes. Remove from the oven and cool for 10 minutes before turning out onto wire rack to cool completely. 

Recipe slightly adapted from: FoodNetwork.com


But seriously, add the walnuts. 

Wednesday, May 30, 2012

Cinnamon Roll Cream Cheese Danish

Remember that time I said I'm not much of a breakfast person?


Well if this is for breakfast then I change my mind.


It's made of cinnamon rolls and everyone knows that cinnamon rolls are perfectly appropriate for breakfast.


This is one of those recipes that is super easy to whip up and everyone always loves it. And if they don't...

Well let's just say you might want to reevaluate that relationship.


Just take a package of cinnamon rolls, unroll them, and then re-roll them.


Mix up a delicious cream cheese filling and pipe in the spaces between the rolls.

You will have extra filling, so do with it whatever you want. (I don't suppose eating it with a spoon is appropriate..
no... I won't tell)

Make this for breakfast.

Cinnamon Roll Cream Cheese Danish

Ingredients:
1 can (17.5 oz) Cinnamon rolls
1 8oz package cream cheese
1/2 cup sugar
2 tsp. sour cream
1 tsp. lemon juice
1 tsp. vanilla

Directions:
Preaheat oven to 350 degrees.

Lightly grease a 9" glass pie plate. Separate dough into 5 rolls. Unroll one roll into a long strip and re-roll in the center of the pan, loosely. Unroll second roll and wrap loosely around the first repeating with remaining dough. In a small bowl, beat remaining ingredients. Pipe mixture down between the strips of dough, starting at the center.

Bake 30 minutes or until golden brown. Cool 5 minutes. Warm icing (from dough pkg) in microwave and drizzle on cake. Serve warm

I'm not sure who the credit goes to for this recipe. I did not create it myself...I enjoyed this deliciousness first at my mom's house.


Monday, May 14, 2012

Peanut Butter Filled Peanut Butter Cookies

I literally have like 8 jars of peanut butter at my house right now.

So naturally I decided to make peanut butter cookies. I actually did even better than that. I made peanut butter FILLED peanut butter cookies.

I'd love to say these are originals. And in a way they are.

But in another way...they are so not. For one thing I am NOT the first person to come up with peanut butter cookies. And I'm probably NOT the first person to fill them with peanut butter. AND I totally didn't make up the cookie recipe.


BUT I did decide to fill them without any outside inspiration whatsoever (outside of the rumblings of my stomach). AND I did make up my own filling.


So there. Non-original originals.

The cookies are a Jif recipe. I figure Jif knows how to make peanut butter, so their peanut butter cookie recipe is probably trustworthy. Turns out it is.

Go figure.


The filling is made of peanut butter, powdered sugar, and a dash of milk.

Tell me you don't want to eat that with a spoon.
You do.


Take a teaspoon of cookie dough and press in the center with your thumb, creating a little boat. Fill with about a teaspoon of the filling. 

Take another teaspoon of cookie dough and put it on the top, pinching around the edges to seal the cookie. 


Press the center with a fork and bake!

Peanut Butter Filled Peanut Butter Cookies

Ingredients:
3/4 cup creamy peanut butter
1/2 cup shortening or butter
1 1/4 cups firmly packed brown sugar
3 tbsp of milk
1 tbsp vanilla extract
1 large egg
1 3/4 cups of flour
3/4 tsp baking soda
3/4 tsp salt
Filling:
3/4 cup creamy peanut butter
1 cup powdered sugar
1/3 cup milk

Directions:
Preheat the oven to 375 degrees and grease a couple cookie sheets. 

Combine the peanut butter, butter, brown sugar, milk, and vanilla in a bowl. Beat until well blended. Add the egg and beat until well blended. In a separate bowl, combine the flour, baking soda, and salt. Add to the peanut butter mixture at low speed. 

For the filling beat the peanut butter and powdered sugar in a separate bowl until combined. Gradually add in the milk until consistency is creamy but "spoonable." You may use more or less than the 1/3 cup of milk. 

For each cookie, take a teaspoon of cookie dough and press in the center with your thumb creating a little boat. Fill with about a teaspoon of the filling. Take another teaspoon of cookie dough and put it on the top, pinching around the edges to seal the cookie. Repeat with remaining dough and filling. 

Bake for 8-10 minutes or until set and just beginning to brown. Cool for 2-3 minutes on the baking sheet and then move to a cooling rack to cool completely. The recipe makes 2 dozen.


Ooey-Gooey.

Wednesday, May 9, 2012

French Breakfast Muffins

French Breakfast Muffins. 


I'm not french and/or do I live in France. So I'm not entirely sure what makes these muffins "French." But I do know the breakfast part. Although, they really should be called "French All-Day-Long Muffins."


Here's the thing about muffins that is just so wonderful: you just mix all the ingredients together with a spoon! Theres no creaming the butter or beating in the eggs. No gradually adding in the dry ingredients (which we all know creates a giant flour cloud no matter how slow you go.) You just mix and stir. Two steps: Mix dry ingredients and wet ingredients. Stir with spoon.


When they are done baking, they come out all beautiful and golden like this. But that's not even the best part. The best part is when you dip them in melted butter and roll them in cinnamon and sugar. 

Well actually the best part is when you consume every last one of them.

French Breakfast Muffins

Ingredients:
1/3 cup of butter, melted
1/2 cup of sugar
1 egg (preferably room temperature)
1 1/2 cup flour
1 1/2 tsp baking powder
1/2 tsp salt
1/4 tsp nutmeg
1/2 cup of milk
Topping:
1/2 cup of sugar
1/2 cup of butter, melted
1 tsp. cinnamon

Directions:
Preheat oven to 350 degrees.

In a large bowl combine all the dry ingredients. Add the wet ingredients and stir until combined. Scoop batter into muffin tins that are sprayed with cooking spray. (I get 8-10 muffins out of the batter)

Bake for 10-12 minutes, or until golden around the edges. 

Mix the cinnamon and sugar in a small bowl. Dip the warm muffins in the melted butter (I dip just the tops), then dip the muffins in cinnamon sugar. 

Recipe from: Velvet Lava


My sister-in-law (who is a fabulous cook by the way) said these were her new favorite muffins. That's validation enough for me!

Tuesday, May 8, 2012

Vanilla Mousse Cheesecake

I had what felt like the busiest week of my life last week. 

I had dinner guests in the middle of the week, and then family visiting at the end of the week. I basically spent every waking moment cleaning or cooking. I felt like the epitome of a proverbial "house wife."

While the million loads of laundry and 3 foot tall dandelions in the front yard about sucked every last ounce of energy I had, there was one thing I could find comfort in. This cheesecake.

I have a lot of experience making cheesecake, but cheesecake is not always reliable. Sometimes the center doesn't set. Sometimes it cracks creating deep, ugly craters on the surface. But this cheesecake was perfect. And I made it twice last week. Both times: perfect.

Plus, the wonderful, reliable thing about this cheesecake is once it's all done baking you cover it with this delicious whipped cream cheese topping. So who cares if it cracks? No one will ever know. 

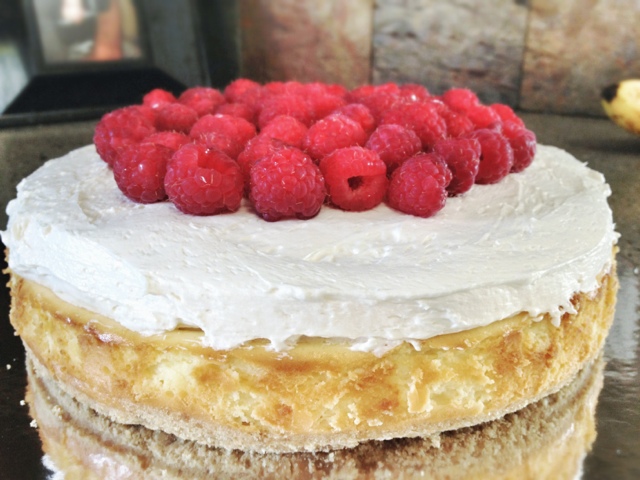
Top it with whatever you want. It's vanilla mousse, so anything will go with it. I did one cheesecake with raspberries and one with strawberries. But you don't have to add fruit. You could do chopped candies, or chocolate shavings. Customize it to your preference.

And then take a deep breath. Eat some cheesecake. And leave those 3 foot tall dandelions for the bees. 

Vanilla Mousse Cheesecake

Ingredients:
40 Nilla wafers, crushed (about 1 1/2 cups)
3 tbsp butter, melted
4 8oz packages of cream cheese, softened
3/4 cup of sugar
1/4 cup of sugar
1 tbsp plus 1 tsp vanilla
3 eggs
1 tub cool whip, thawed

Directions:
Preheat oven to 325 degrees. 

Mix the wafers and butter and press onto the bottom of a 9-inch springform pan. 

Beat 3 packages of the cream cheese, 3/4 cup of sugar, and 1 tbsp of vanilla until well blended. Add the eggs one at a time, mixing on low just until blended. (When making cheesecake, it's important not to mix the batter any more than necessary. Mixing too much for too long will cause the cheesecake to crack when baking.)

Pour the batter over crust and bake 50-55 minutes or until the center is almost set. (Place a baking dish filled with water on the lower rack in the oven while the cheesecake bakes. It will keep the oven humid and prevent cracking.) 

Once the cheesecake is done, turn the oven off and leave the cake in the oven with the door open (cracked) to cool. Once it is mostly cooled, run a knife around the rim of the pan to loosen. Cover and refrigerate before removing from the pan. 

Beat the remaining cream cheese, sugar, and vanilla with the mixer until well blended. Fold in the cool whip and spread over the cheesecake. Refrigerate 4 hours. Remove rim of pan before serving. 

Top with fresh berries. (Or anything you want)

Recipe from: Kraft Foods

You don't have to have company to have cheesecake you know. 

Wednesday, May 2, 2012

Custard Filled Eclairs

I've always enjoyed custard filled eclairs. Especially those frozen mini ones you find in the dessert section. Seriously yum.


Although I'd never really even considered making my own. Pastries and donuts and really any dessert that isn't cheesecake or cookies was totally out my league. But then one day my husband (oh so lovingly) said, "How come you've never made me custard filled eclairs? They're my favorite!"

Ok. You win husband.

Turns out these aren't even scary! I know I keep saying "Seriously it's so easy!" with everything I post. But seriously. It's so easy. AND how often do you show up to a party and someone brings custard filled eclairs? Basically never.


When I made these I hadn't planned on posting them in a blog, so my pictures are sparse. But its pretty basic stuff.
Custard. Pastry. Ganache.
Bake. Fill. Frost. Eat.

Custard Filled Eclairs

Ingredients:
Choux Pastry:
1/2 cup butter
1 cup water
1 cup all-purpose flour
1/4 tsp salt
4 large eggs
Custard Filling:
1 package instant vanilla pudding mix
2 cups milk
1 cup heavy cream
1/4 cup powdered sugar
1 tsp vanilla extract
1/4 tsp salt
Ganache:
1 cup semisweet baking chocolate (or chocolate chips)
6 tbsp heavy cream

Directions:
Preheat oven to 450 degrees. Lightly grease a large cookie sheet and set aside.

Combine butter and water in a medium saucepan and bring to a boil, stirring to melt butter. Reduce heat to low and stir in flour and salt with a wooden spoon until the mixture begins to form a stiff ball of dough.

Immediately remove from heat and add eggs, one at a time, stirring vigorously after each addition to ensure they are incorporated. I created a bowl shape in the dough to drop the egg in and mixed quickly, especially with the first one, to prevent it from cooking into scrambled eggs on the bottom of my warm pan.

With a pastry bag fitted with a large tip (or cut the corner off a plastic baggie), pipe the thick dough onto prepared cookie sheet into 10 strips approximately 1 1/2 x 4″ each.

Bake for 15 minutes, then reduce heat to 325 and bake another 20 minutes, until puffed and golden and hollow sounding when lightly tapped on the bottom. When removed from oven, IMMEDIATELY pierce the ends almost through to the other side to let steam escape and prevent any sogginess in the middle. This hole is also where you will be piping your filling into. Let cool completely before filling and icing (this will only take about half an hour).

Meanwhile, combine pudding and milk in a bowl and mix according to package directions. In a separate bowl, beat the heavy cream with an electric mixer until soft peaks form. Beat in powdered sugar, vanilla, and salt. Fold whipped cream into pudding.

Scoop the mixture into a pastry bag fitted with a smallish tip (I enlarged my steam holes a bit to make my tip fit, so do whatever works) and pipe mixture into centers of eclairs until full. It's kind of messy, but I found if you let the custard chill in the fridge before filling the eclairs and then place them in the fridge when they are done they will set up nicely.

Finally for the ganache, heat 1/2 cup of chocolate and 3 tablespoons of heavy cream in the microwave for 20 seconds. Stir until completely melted. With a spoon spread the ganache on each eclair. Repeat with the remaining ganache ingredients if necessary. Store the eclairs in the fridge.

Recipe adapted from: Hidden Ponies


Show up to a party with these. You'll win.